
SP-RO400AQD
Congratulations on your purchase of a SpiroPure SP-RO400AQD RO-DI filtration system! You are well on your way to producing your own high-quality deionized water, saving you money and helping create a healthy environment for your fish and other aquatic life to thrive in, or using deionized water for appliances, car washing, CPAP machines, or other appropriate use.
Please follow these instructions carefully to ensure that you set up your system swiftly, safely, and effectively.
System Overview
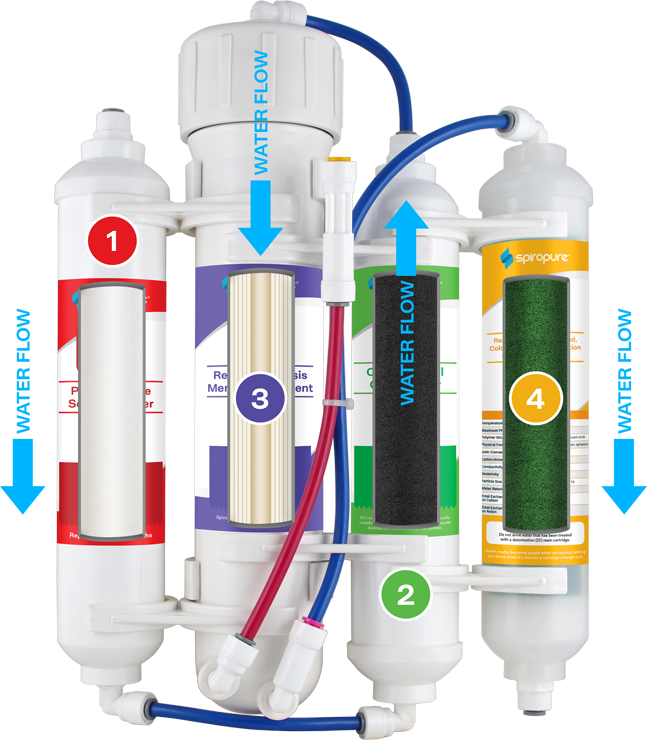
The SP-RO400AQD uses a 4-stage filtration process to produce clean, deionized water with very low amounts of TDS (total dissolved solids).
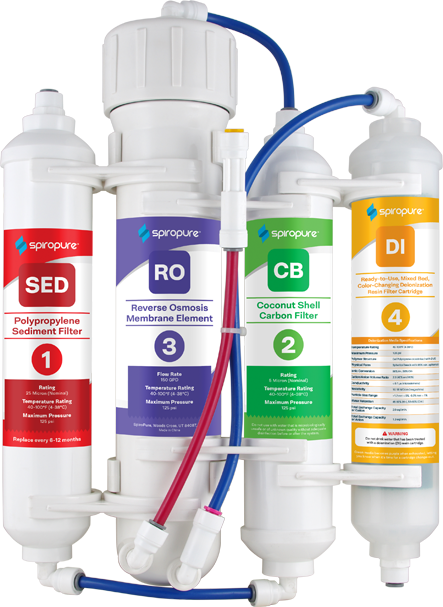
The system has four cylindrical filters in total. The sediment filter helps remove larger particles and impurities like dirt, rust, and silt. This process also helps to protect the second filter, a carbon block that reduces chlorine and volatile organic compounds. In the third filter, the water is forced through a semipermeable membrane that reduces trace amounts of the total dissolved solids (TDS) in the water, such as lead and arsenic, as well as parasitic cysts. Finally, the water is forced through a resin bed in the DI filter, stripping the water of its negative and positive ions.
 Warning
RO-DI water is not recommended for human consumption. It is not toxic, but with most of its mineral content stripped, the majority of its nutritional value is removed.
Parts List
|
4-Stage Filtration System Manifold with sediment, carbon, reverse osmosis, and deionization cartridges, with attached connection and wall-mounting brackets |
|
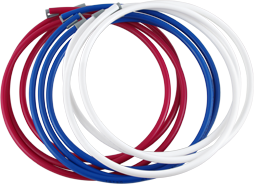
3 Color-Coded Hoses white for source water blue for filtered water red for waste water |
|
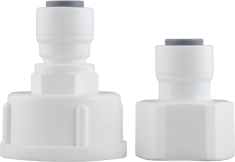
Faucet Adapters 1/2" and 3/4" Quick-Connect adapters |
|
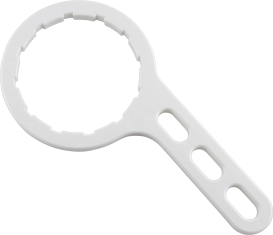
Filter Wrench Used to tighten RO filter housing cap |

|
Collet Tool (Optional) Used to depress quick-connect collets |
|
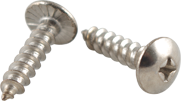
Wall Mount Bracket Screws 2 phillips head screws |
Preparing for Installation
The SP-RO400AQD filtration system can be permanently installed near a water source, or it can be set up for temporary filtration sessions and stored when not in use.
The system produces a fair amount of wastewater during the filtration process, which is something to keep in mind when selecting a location for your system. Ensure that you have a source of water and a means of disposing of the system's waste water before installation.
If you are setting the system up for temporary use, simply lay it out horizontally on a waterproof counter or floor and attach the hoses as indicated, running the system for as long as required.
Setup & Installation
- Unscrew RO membrane housing lid and remove plastic-wrapped RO membrane. Remove RO membrane from plastic wrapper and reinsert into housing. Ensure that the large black gasket is facing up and the end with the two black O-rings on the protruding cylinder is facing down. Press in until the cartridge is firmly seated. Screw on RO membrane housing lid hand-tight, then tighten a quarter-turn or so using the provided filter wrench. Be careful not to overtighten, as that can break the housing.
- If mounting unit on wall, remove wall mount brackets from the RO membrane cylinder and attach securely to wall stud or other sturdy anchor point, using a power drill to pre-drill holes. Ensure that you are mounting the system near an appropriate water source and a drain. The unit can also be laid on a countertop or under a sink.
- Remove white plug from stage 1 filter and connect the source water line (white hose). Tug gently on the hose to ensure that it is firmly seated.
- Remove blue plug from the stage 2 filter by depressing the collet using your finger or the enclosed collet tool. Attach the short blue hose coming from the RO membrane cap. Push tubing in firmly until it is seated. Tug gently to ensure proper seating.
- Remove red plug from the bottom of the RO canister and connect the red waste water line, ensuring that the line is firmly seated.
- Attach the white source water hose to your faucet or garden hose using one of the provided adapters. Ensure that the rubber O-ring is seated in the faucet adapter.
- Attach the blue hose from the RO membrane to the top of the DI canister. Remove blue plug from other end of DI canister and connect blue filtered water line, ensuring that the line is firmly seated.
- Flush system for 30 minutes, discarding all water.
- Your filtration system is now ready for use!
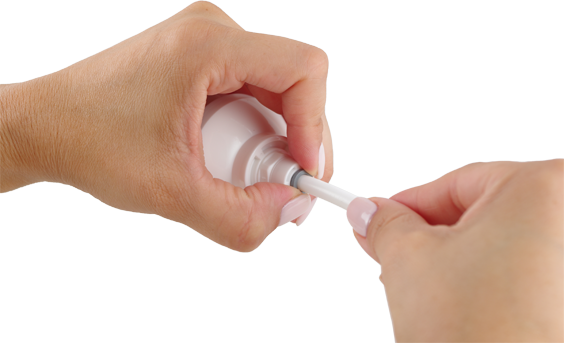
Hose Connection Tips
|
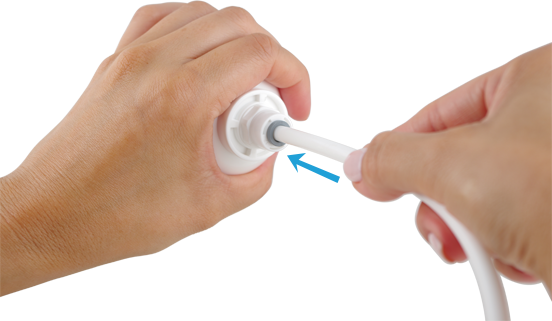
Push provided hoses firmly into place. |
|
Tug on hoses gently to ensure that they are seated. |
|
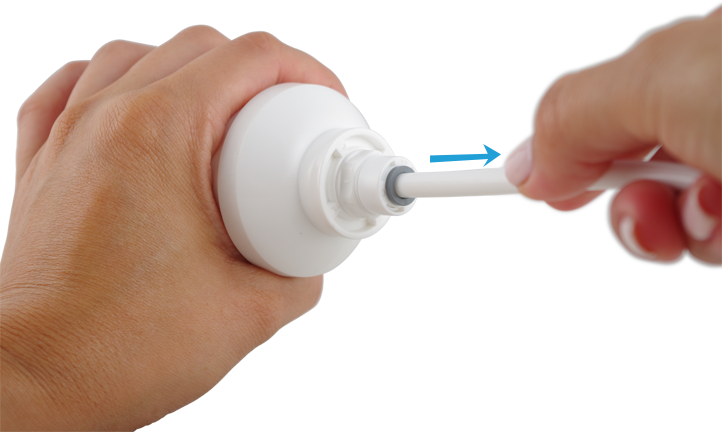
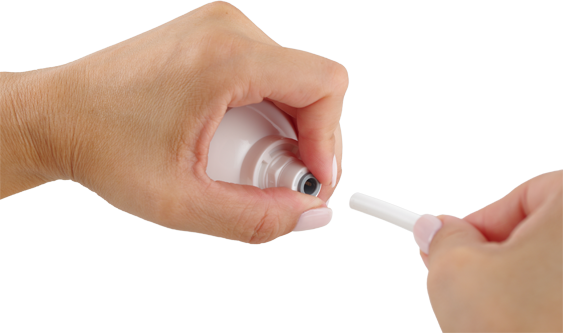
To remove hose, depress gray collet with your fingernail, or the provided collet tool, and pull. |
Hose Cutting Techniques
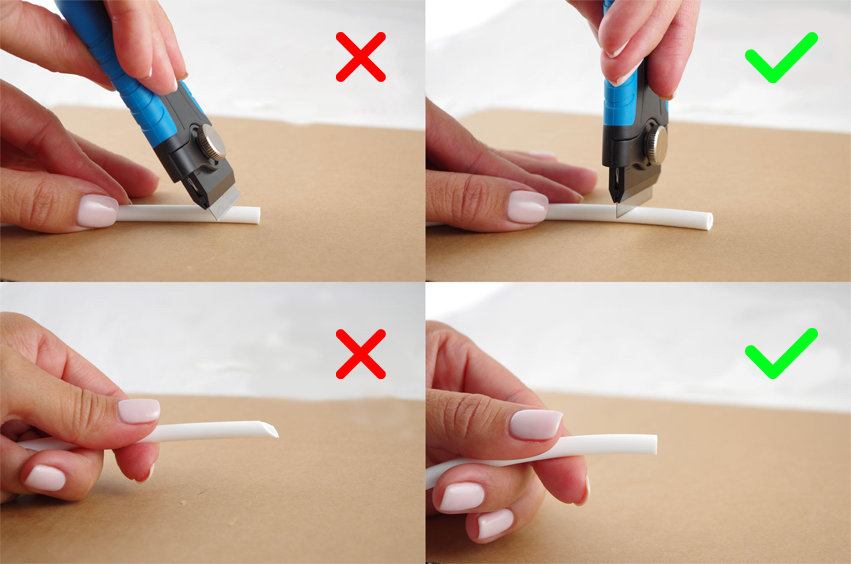
If you need to cut any hoses, use a straight-edged razor blade or a set of 90-degree tubing cutters rather than scissors, which can crimp the tubing, causing leaks. Cut at a straight 90-degree angle to ensure proper fit.
Filter Replacement
All three filters and the RO membrane must be replaced when the DI resin bed in the stage 4 filter (clear housing) turns from green to purple, or yearly at minimum. Usage and source water quality will determine filter life.
- Disconnect all hoses. Note that the system will drain some water, so this is best done over a sink or outside.
- Discard spent filters and RO membrane (do not throw away RO membrane housing).
- Install replacement RO membrane, ensuring that the end with the two rubber O-rings is facing down. Tighten cap by hand, then a quarter turn with the filter wrench. Be careful not to overtighten, as that can break the housing.
- Install replacement in-line cartridges on plastic brackets. Replacement sets, available from SpiroPure, come with quick-connect fittings pre-installed.
- Reconnect hoses, following the diagram.
FAQs
- The flow rate seems slow. How fast of a flow rate should I expect from a 150 GPD membrane? While the membrane is rated to be 150 GPD, in actual practice it is unlikely the system will produce 150 GPD in your home, which is the case for any RO system on the market. This is because the actual flow rate will depend upon a number of factors, including water pressure, water temperature, and the amount of contaminants present in your water. The 150 GPD rating you see on our system and the rating on any other RO system is determined under laboratory conditions, which will use optimal water pressure (generally 60 psi), optimal water temperature (usually around 77 degrees Fahrenheit), and controlled levels of TDS. It would be impossible to test the system at every combination of pressure ratings, temperatures, and TDS levels. Higher levels of contaminants will plug filters faster, reducing water flow, and lower water pressure will also produce lower flow rates. In addition, lower temperatures can cause significant reduction in flow rate, and, as a result, you will probably have higher flow rates in the summer than you do in the winter. As a rule of thumb for any RO system, you can usually expect to experience a flow rate that is 50% to 75% of the listed GPD rating for that system.
- Will this connect to my faucet? The provided adapter(s) will fit most standard faucet types but not all.
- What is the ratio of wastewater to filtered water? The average system has a ratio of 1:4. This means that for every 1 gallon of pure, filtered water, about 4 gallons of water is sent down the drain as wastewater. However, this number can vary depending upon a number of factors, resulting in anywhere from 3 gallons of wastewater to as much as 25 gallons of wastewater per 1 gallon of purified water.
- How long will it take to fill a 5-gallon tank? This is a 150 GPD system, so it will fill a 5-gallon tank in a bit over an hour.
- I live somewhere with high sediment content in the water. Will I need an additional pre-filter? You may. Check local water conditions and any warnings. You can add an inline sediment filter to the system, such as SpiroPure SP-IS105QC, before the SP-RO300AQ or SP-RO400AQD.
- Can the system be connected to a normal garden hose? Connect the system to your garden hose using the ¾" connector.
- I only plan on using this occasionally. How should I store the filters between uses? If you are using the system weekly, there is no need to store between uses. If you are not planning on using the system for several months, however, the filters should be stored. Remove sediment and carbon block filters. Let drip dry, then wrap in plastic bags and store in your refrigerator or somewhere cool and away from direct light. Preserve RO membrane in a preservative solution (typically 2% AM-88 Membrane Preservative and 20% AM-225 Glycerine). Store in refrigerator or somewhere cool, away from direct light. Wrap DI cartridge in foil or mylar to prevent exposure to air, which will deplete the DI resin. Store as with the other filters. Warning: any prolonged exposure to air will deplete the resin bed, shortening the cartridge's life. Filters should not be stored for longer than six months.
- What size is the tubing? It is 1/4" tubing.
- Does this come with initial cartridges for use, or do I need to purchase the cartridges separately? The system comes with an initial set of filters.
- What is deionized water? Deionized water has had all of its ions removed. Positively charged ions (cations), such as calcium and magnesium, and negatively charged ions (anions), such as sulfates and nitrates, are removed as they pass through the DI resin bed.
- What is deionized water used for? Deionized water is used for aquariums, particularly saltwater aquariums, which require very clean, neutral water. It can also be used for spot-free car washes and in appliances, such as CPAP machines, irons, and humidifiers, helping to reduce mineral build-up and clogging. DI water has a variety of other uses as well: automobiles, the creation of cosmetics, laboratory work, etc.
- Is deionized water safe to drink? While deionized water is not toxic or unsafe to drink in small quantities, it is not recommended for regular human consumption.
- How long do the filters last? Filter life depends on several factors, such as frequency of use and quality of source water. All filters should be replaced when the DI filter (final stage filter with a clear housing) turns from green to purple. Six months is an average lifespan for a filter set. Filters must be changed at least once per year.
- Will this system work to produce just RO water if I remove the DI filter? Yes.
- Can I buy full replacement filter sets? Yes, they are available here: SpiroPure SP-RO425.
- I have the SP-RO400AQD RO/DI filter system and used a TDS meter. After the first two stages (sediment and carbon) the PPM of the water rises, and after the RO stage, it drops as expected. But then after the final DI stage, the PPM rises once more. Is the filter system defective? PPM is a measurement of the TDS (total dissolved solids) inside of the water. Sediment filters are designed to remove large sediment particles, and carbon filters absorb chemical impurities from water (such as chlorine), and are not designed to filter or reduce TDS at all. In fact, a new carbon filter will increase the PPM of TDS in water as it sheds carbon fines, but this should reduce after a couple of days of use. This is why it is recommended that you flush a new carbon filter, particularly if it is before an RO or DI cartridge as it can cause premature fouling of the RO or DI media. RO membranes, however, are designed to reduce TDS from water, and TDS meters are designed specifically to measure TDS reduction after more in-depth filtration like that provided by RO membranes. Deionization (DI) can then provide further reduction of TDS from water. To see the desired results, we recommend using the filter system without the DI cartridge for a few days when first using the system or after replacing the carbon filter to ensure the carbon fines are gone. After that, reintroducing the DI cartridge should reduce the amount of TDS even further after the RO membrane filtration.