
SP-ID200QC Ready-to-Use, Mixed Bed, Color-Changing Deionization Resin Filter Cartridge
Green media becomes purple when exhausted, letting you know when it is time for a cartridge change-out.

Warning
Do not drink water that has been treated with a deionization (DI) resin cartridge.
Filter Specifications
| Size | 2.5" x 12" (6.7 cm x 28.3 cm) |
| Inlet/Outlet Port | 1/4" Quick-Connect |
| Temperature Rating | 40-100°F (4-38°C) |
| Maximum Pressure | 125 psi (8.6 bar) |
| Media | Color-Changing, Mixed Bed Deionization Resin |
Deionization Media Specifications
| Polymer Structure | Gel Polystyrene crosslinked with DVB |
| Physical Form | Spherical beads with 95% min. sphericity |
| Ionic Conversion | 99% H+, 90% OH- |
| Cation/Anion Volume Ratio | 2:3 (40% and 60%) |
| Conductivity | ˂ 0.1 μs (microsiemens) |
| Resistivity | 10-18 MΩ/cm (megaohms) |
| Particle Size Range | +1.2 mm ˂ 5%, -0.3% mm ˂ 1% |
| Water Retention | 45-50% (H+), 53-60% (OH-) |
| Total Exchange Capacity for Cation | 2.0 eq/l min. |
| Total Exchange Capacity for Anion | 1.3 eq/l min. |
Tools Needed for Installation

|
Utility knife or scissors |

|
Empty bucket |

|
Adhesive tape |
Installation Instructions
- Select a location for the inline filter that allows for adequate access for easier future filter replacements.
- Turn off the water supply to the tubing where the inline filter will be installed.
- Remove the existing filter or cut the cold water tubing where the filter will be installed.
- Note: Cut tubing square and cleanly. An uneven or rough cut may damage the internal o-ring and cause leaks.
- Remove the blue clips on both ends of the inline filter.
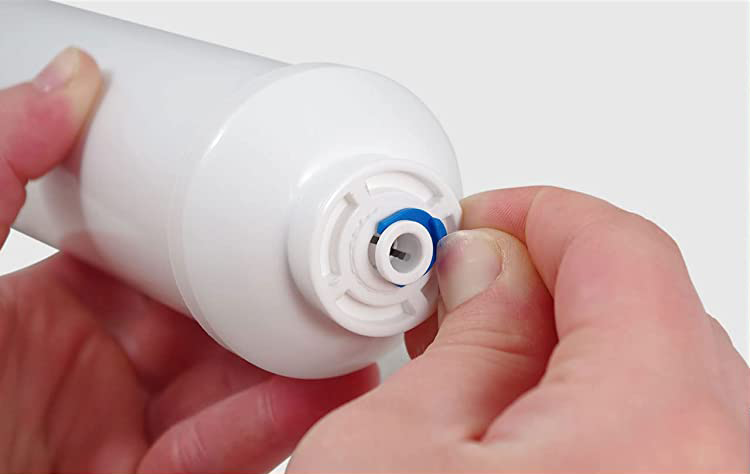
- Confirm that the water flow matches the flow direction arrow on the cartridge.
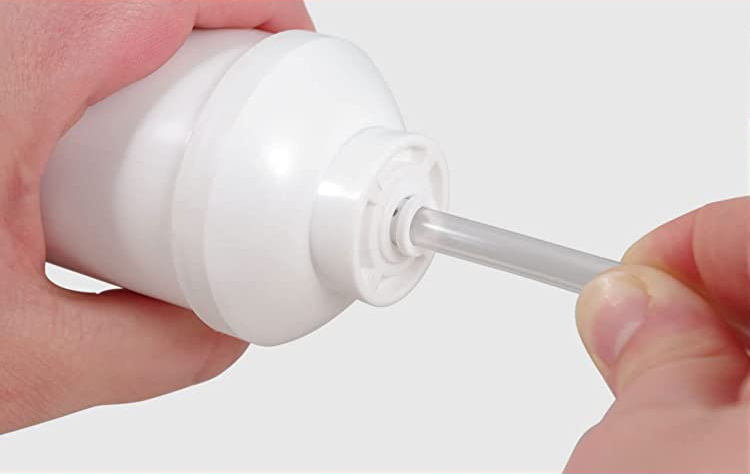
- Insert the water supply end of the tubing into the quick connect fitting on the end of the filter.
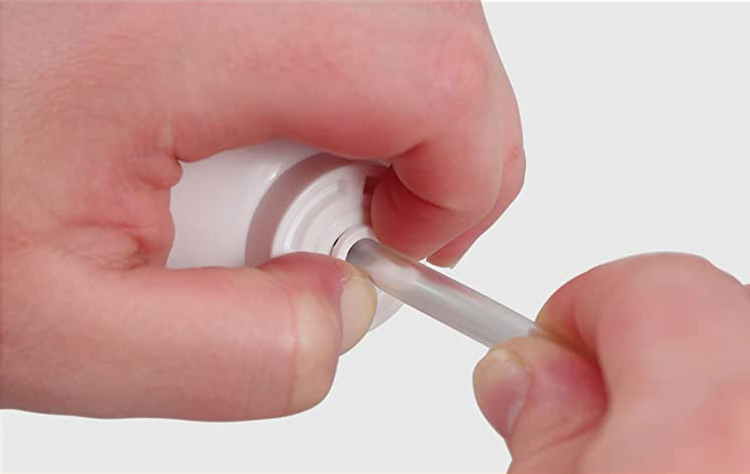
- Once the tubing has bottomed in the fitting and cannot be pushed in any further, gently pull back to ensure the tubing is secure.
- Slowly turn on the water supply and flush the filter with water into a bucket. Run the water for 5 minutes.
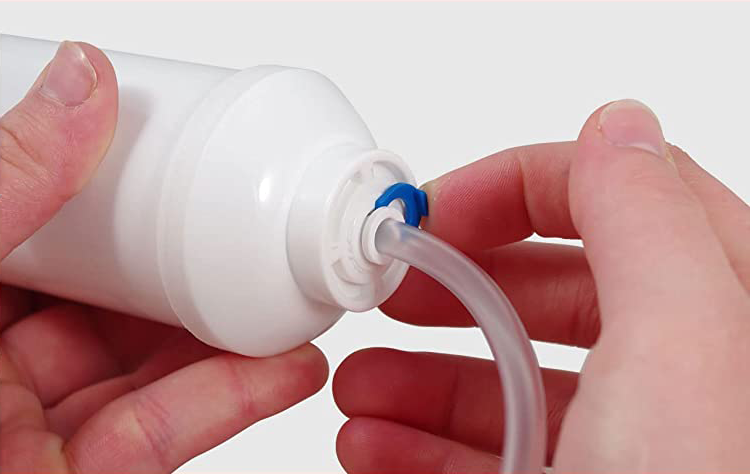
- Reinstall the blue clips in the groove on the quick connect fittings on each end of the filter cartridge.
- Connect the other appliance end of the tubing to the outlet of the filter. Secure the filter to the back of the appliance or wall using adhesive tape.
- Turn on the water and check for leaks. Continue to check for leaks for several days.
- Replace your filter cartridge once the media has been exhausted. Exhausted media will have changed in color from green to purple.